Debug Log Studio - Post-Install Setup Guide
Thank you for installing Debug Log Studio! Follow the steps below to complete the one-time configuration before using the app.
⏱ Estimated setup time: 10–15 minutes
🔐 Required access: Salesforce System Administrator
Prerequisites
- Salesforce org with Agentforce enabled
- System Administrator profile or equivalent permissions
- Access to Setup (External Client Apps, Auth Providers, Named Credentials, Remote Site Settings)
Setup Overview
The Debug Log Studio Setup tab inside the app will guide you through each step with an in-app wizard and progress bar. This page is a companion reference.
| Step | What You’re Creating | Purpose |
|---|---|---|
| 1 | Org Domain confirmation | Generates correct callback and OAuth endpoint URLs |
| 2 | External Client App | OAuth client that authenticates Tooling API callouts |
| 3 | Auth Provider | Links the External Client App to Salesforce OAuth |
| 4 | Named Credential (Legacy) | Stores authenticated connection for Apex callouts |
| 5 | Remote Site Setting | Allows callouts back to your own org’s Tooling API |
| 6 | Validate & Save | Tests the connection and persists configuration |
Step-by-Step Instructions
For detailed screenshots and instructions for each step, see the full User Guide.
Quick Reference
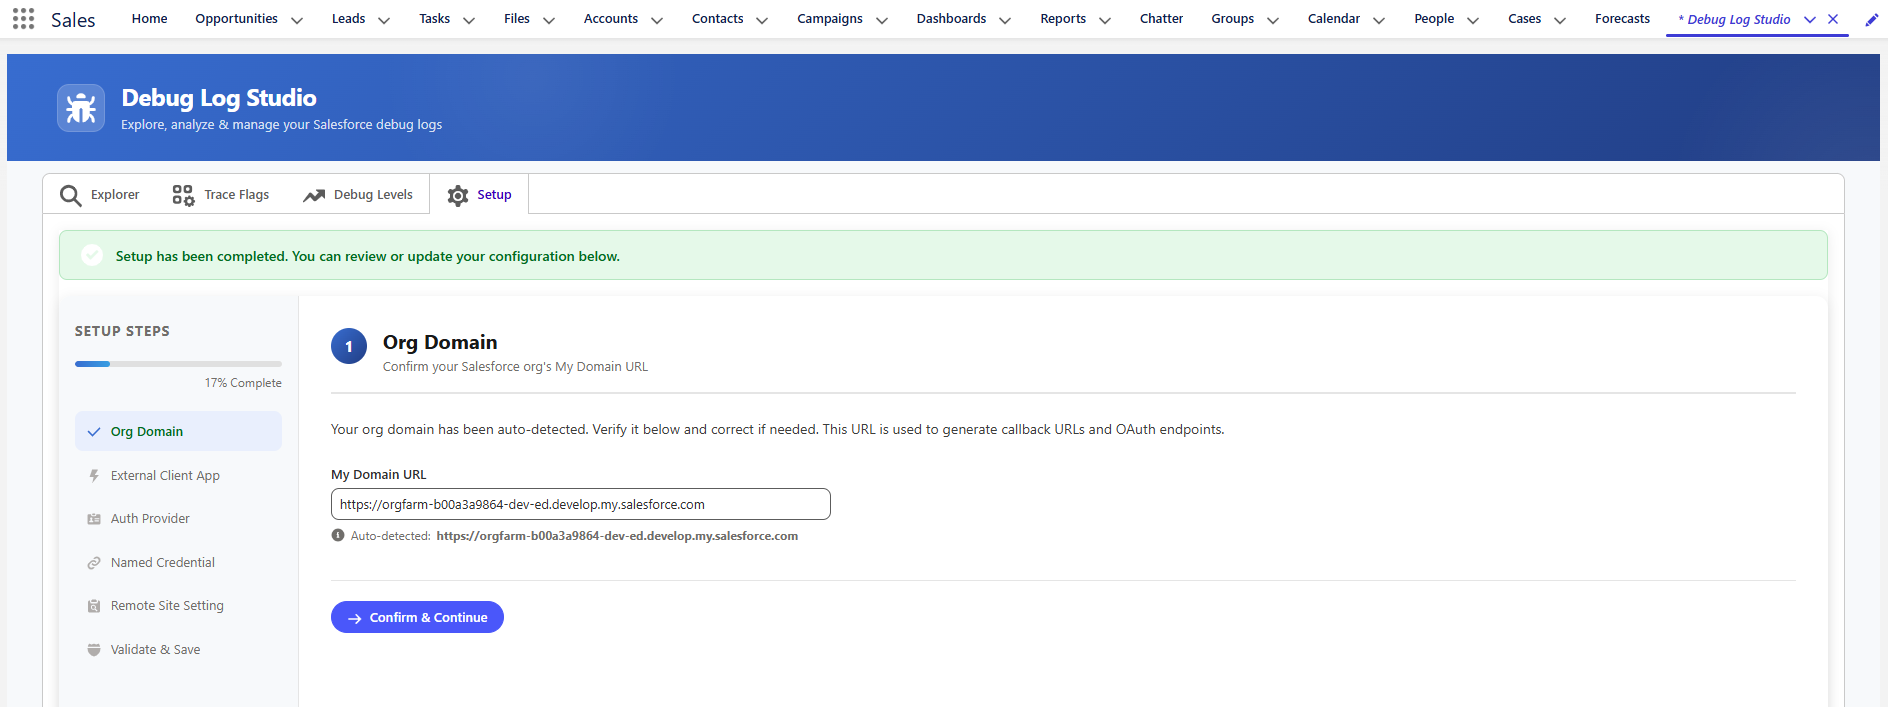
Step 1 - Org Domain
- Open Debug Log Studio → Setup tab
- Verify the auto-detected My Domain URL
- Click Confirm & Continue
Step 2 - External Client App
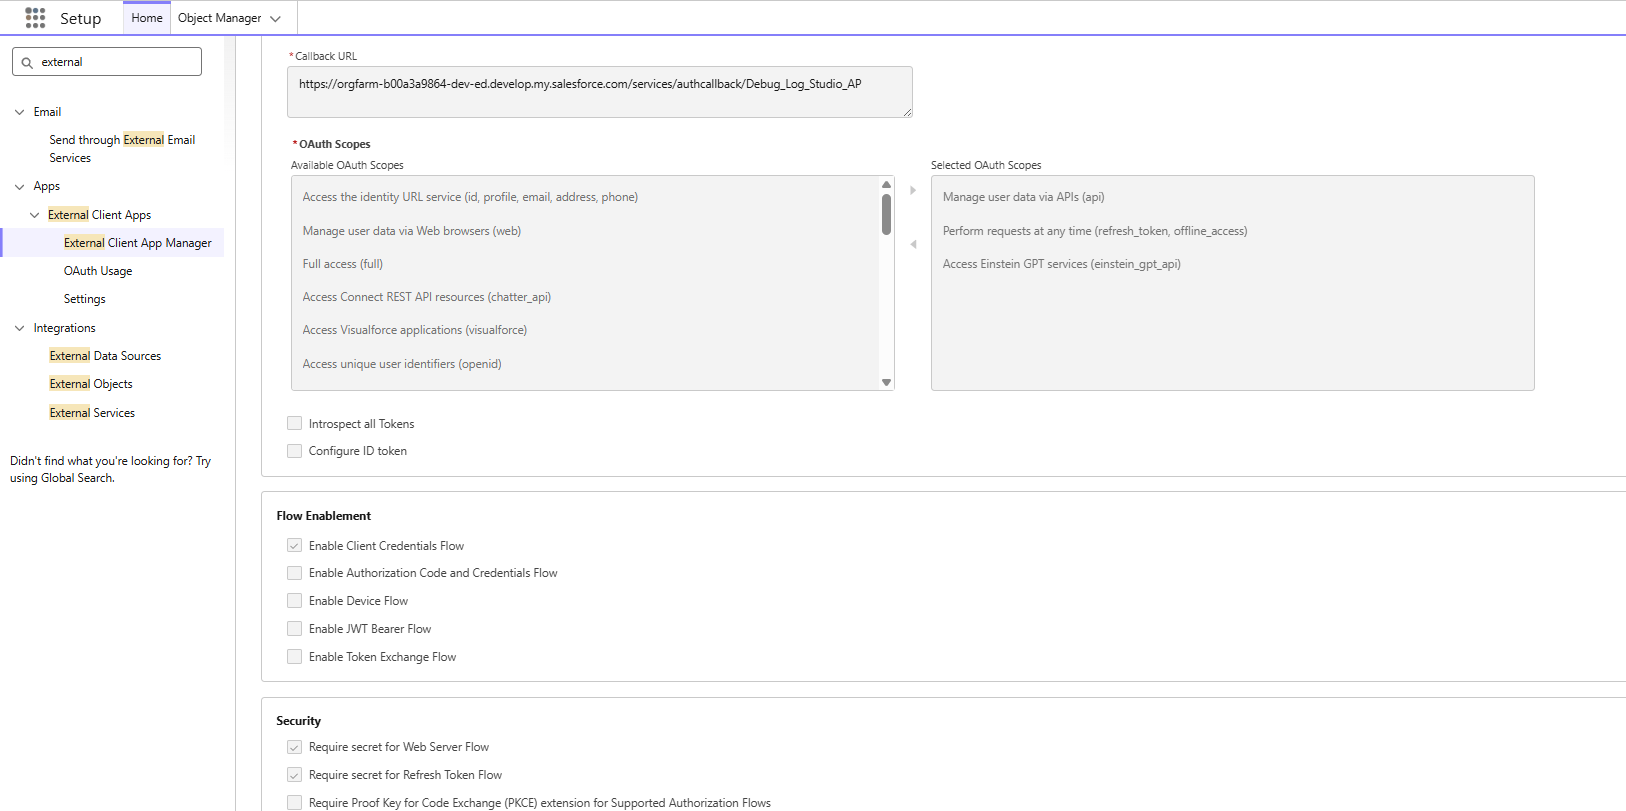
- Setup → Apps → External Client Apps → External Client App Manager → New External Client App
-
Name: Debug Log StudioAPI Name: Debug_Log_Studio - Enable OAuth, paste the Callback URL from the setup wizard
- OAuth Scopes:
api,refresh_token / offline_access,einstein_gpt_api - Flow: Enable Client Credentials Flow
- Security: Enable Require Secret for Web Server Flow and Require Secret for Refresh Token Flow
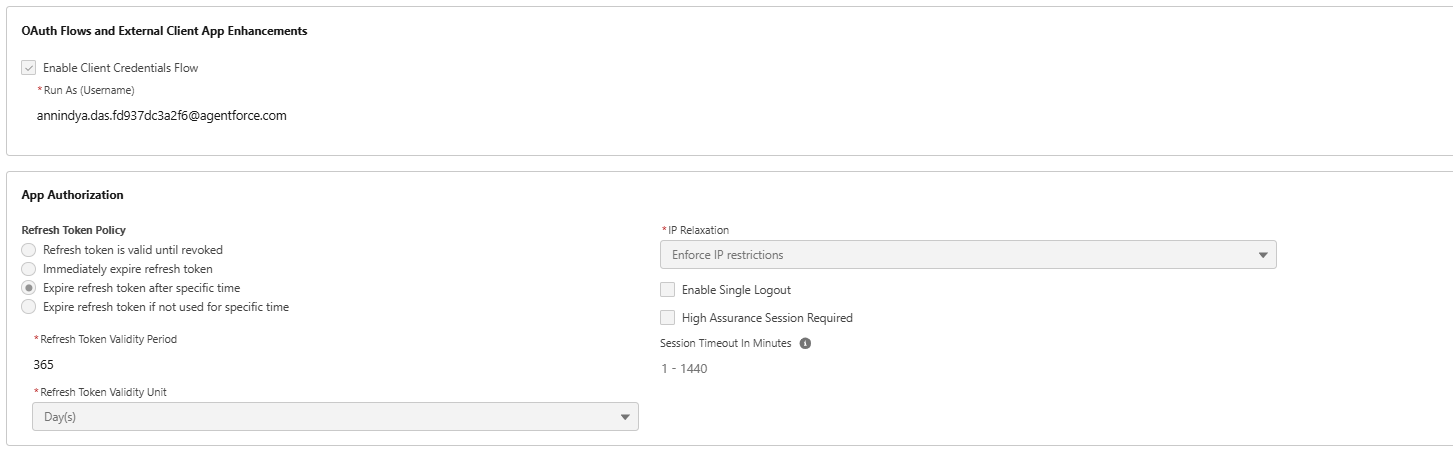
- Policies tab: Enable Client Credentials Flow, set Run As to an admin user
- ⚠️ Copy the Consumer Key and Consumer Secret before proceeding
Step 3 - Auth Provider
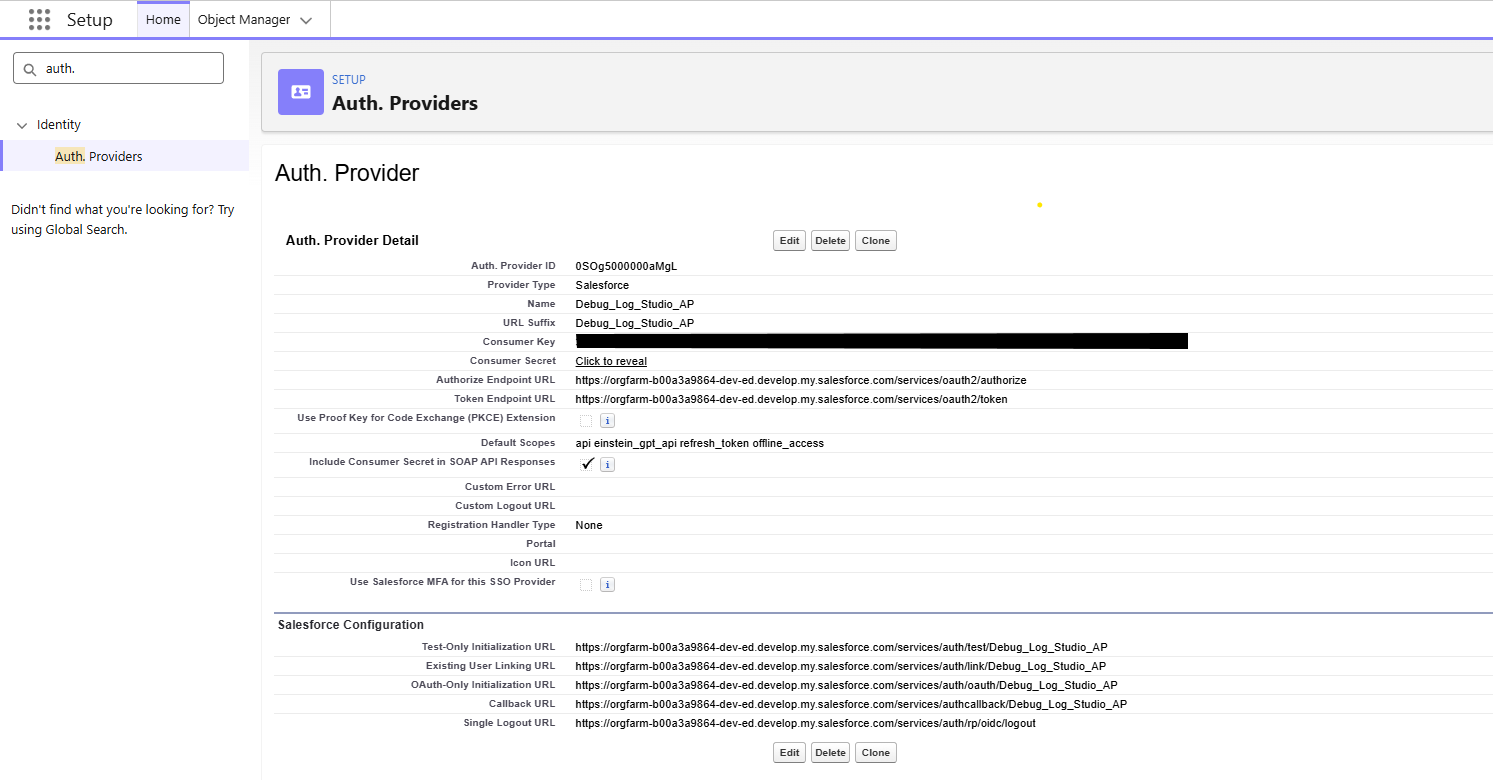
- Setup → Identity → Auth. Providers → New → Provider Type:
Salesforce - Name:
Debug_Log_Studio_AP - Paste Consumer Key, Consumer Secret, Authorize Endpoint URL, Token Endpoint URL, Default Scopes from wizard
- Click Save → click “I’ve created the Auth Provider” in the wizard
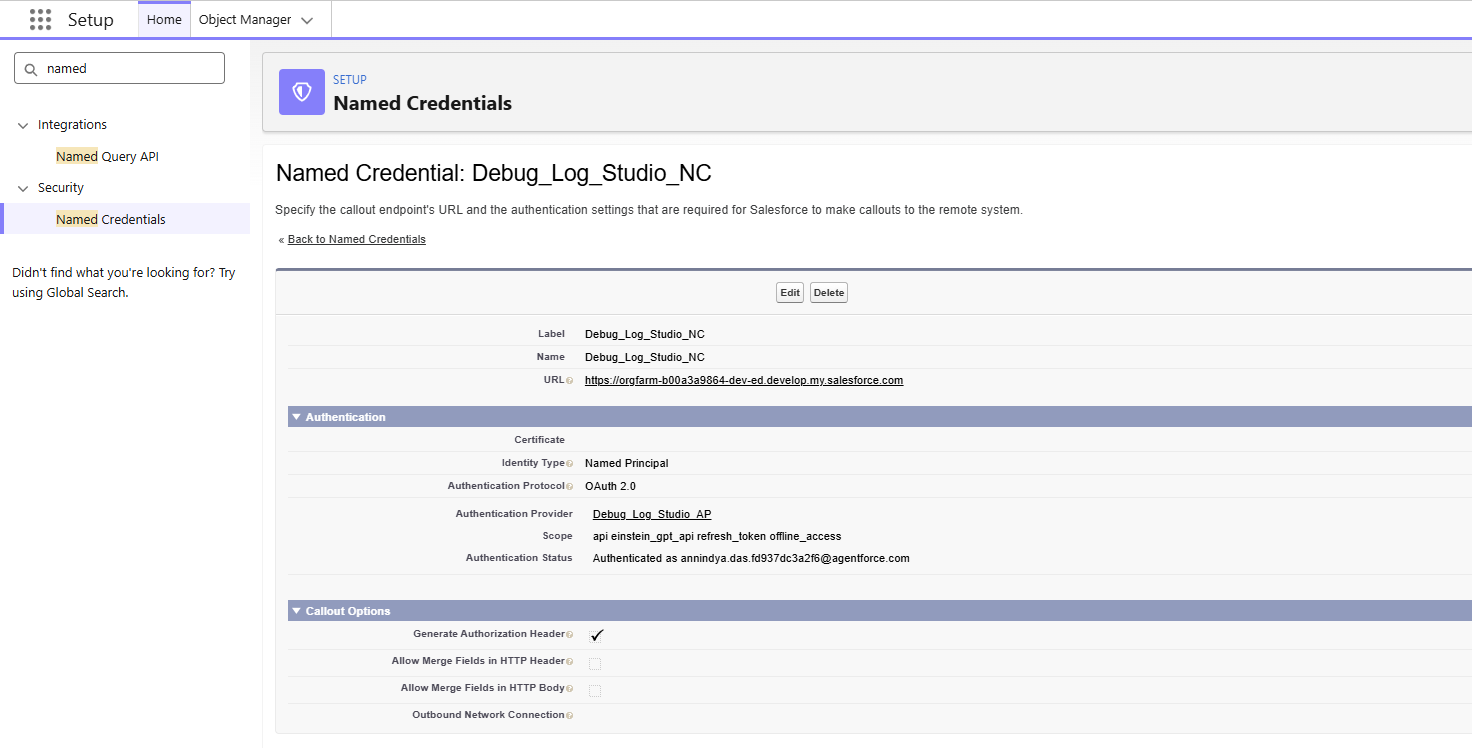
Step 4 - Named Credential
- Setup → Security → Named Credentials → New Legacy (use the dropdown, not New)
- Label & Name:
Debug_Log_Studio_NC - URL: your org domain (from wizard)
-
Identity Type: Named PrincipalProtocol: OAuth 2.0Auth Provider: Debug_Log_Studio_AP - Check Start Authentication Flow on Save and Generate Authorization Header
- Click Save → click Allow on the OAuth screen
Step 5 - Remote Site Setting
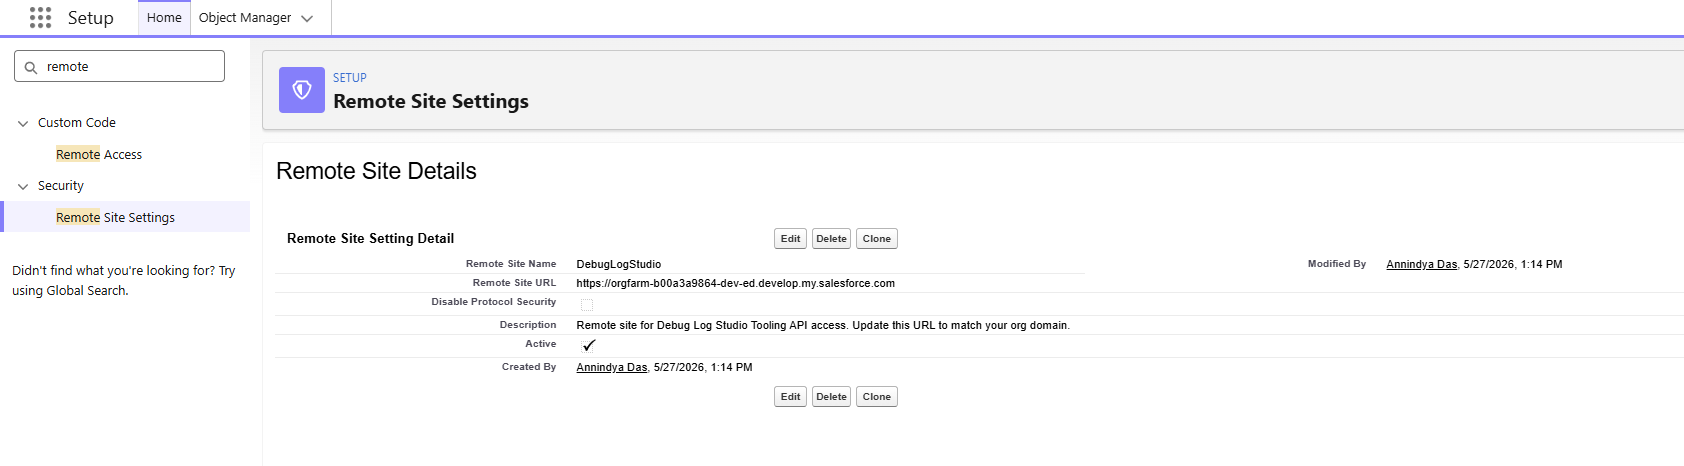
- Setup → Security → Remote Site Settings → New Remote Site
-
Name: DebugLogStudioURL: your org domain (from wizard) - Description:
Remote site for Debug Log Studio Tooling API access. - Ensure Active is checked, leave Disable Protocol Security unchecked
- Click Save
Step 6 - Validate & Save
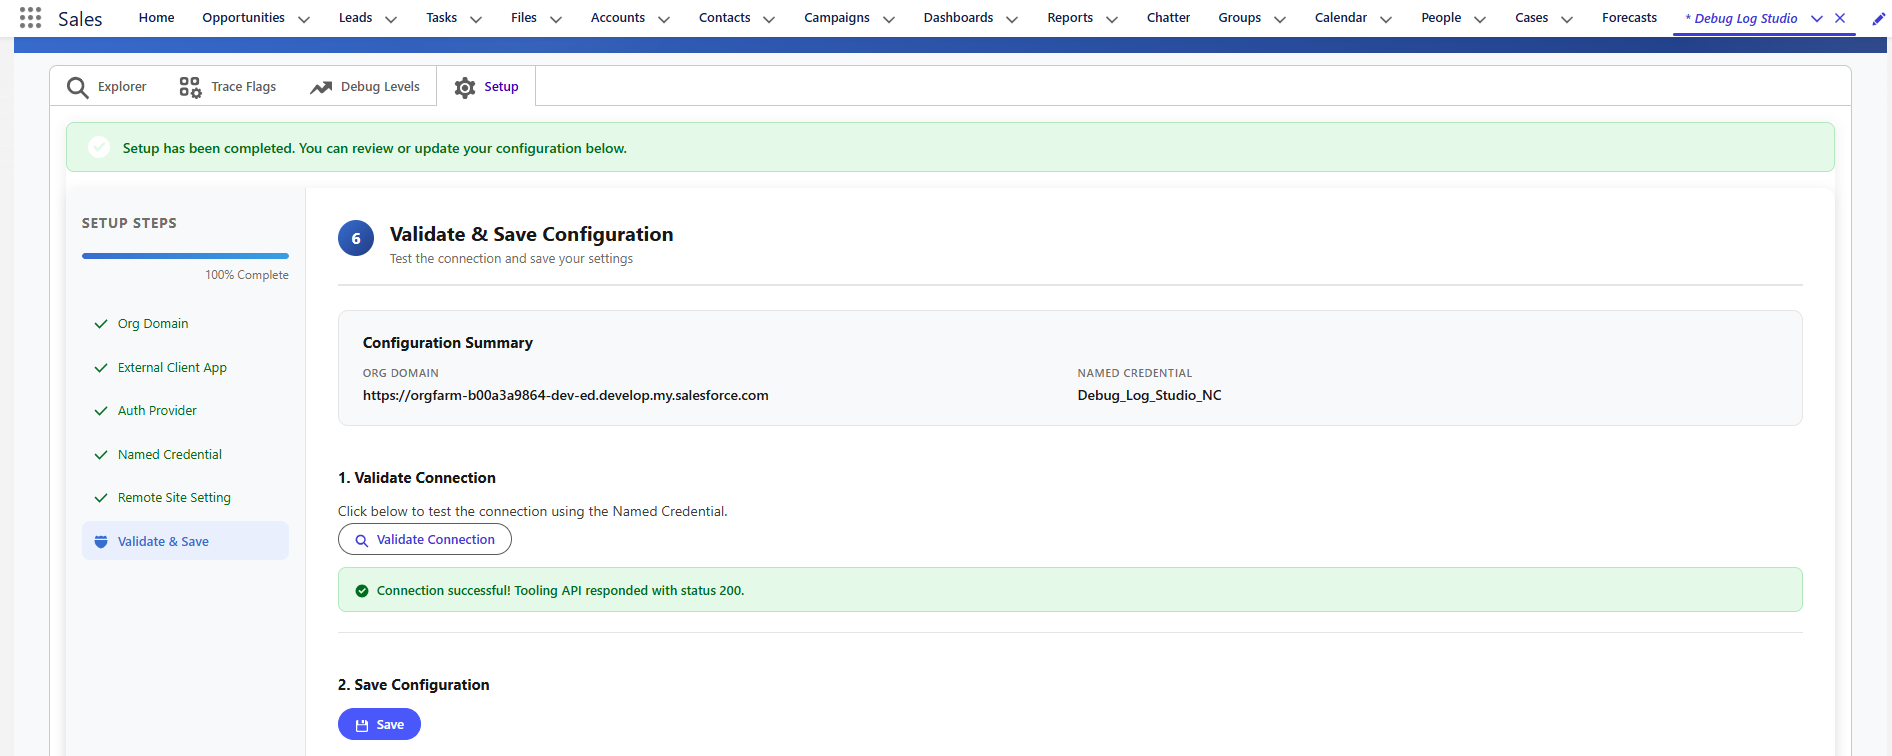
- Click Validate Connection - look for:
Connection successful! Tooling API responded with status 200. - Click Save - look for:
Setup has been completed.
Troubleshooting
| Issue | Likely Cause | Fix |
|---|---|---|
| Validate Connection fails | Named Credential not authenticated | Re-save the Named Credential with Start Auth Flow on Save checked |
| Callback URL mismatch | External Client App Callback URL incorrect | Re-check the Callback URL matches exactly what the wizard shows |
einstein_gpt_api scope missing |
Agentforce not enabled | Enable Agentforce in your org before installing |
| Remote Site error | Remote Site URL doesn’t match org domain | Ensure the URL matches your org domain exactly (no trailing slash) |
What’s Next?
Once setup is complete, see the User Guide to start capturing and analyzing debug logs.
| *Part of the adasApps AppExchange Documentation | Built for the Salesforce community.* |